
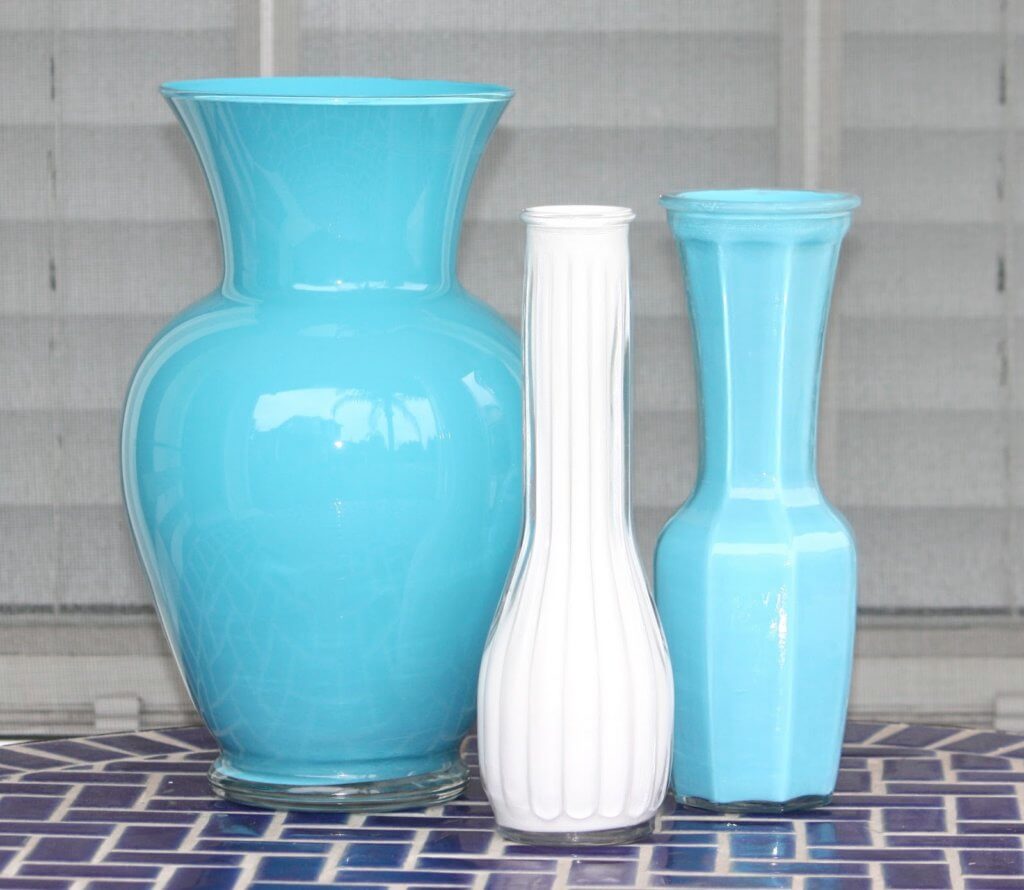
There are several ways to paint on glass, and I hope these lessons will answer your questions. Please keep in mind that glass is a non-porous surface, and it will take your paint longer to dry than it would on wood, paper, or fabric. You could use a hairdryer set on a low heat setting to help the paint dry a little quicker.

Using Regular Acrylic To Paint Glass
Using Enamels or Glass Paints Glass Prep Finishing Up Air Dry or Bake in Oven Cleaning or Washing the Painted Glass
Using Regular Acrylic Paints
Do not bake if you have painted the project with acrylics Glass Prep – When prepping glass to paint with acrylics, first clean glass of all fingerprints and oils with hot water and soap. Washing in the dishwasher is a great idea! After the glass is clean, you may wish to rinse off any soap residue with rubbing alcohol or white vinegar.
Krylon 1311
Spray the glass with Krylon Matte Finish 1311. That will give the surface of the glass a little “tooth” so the paint can “grab” onto the glass. The color may roll-up or separate if you paint acrylics directly on the glass. If you don’t have any Krylon 1311, any matte varnish should work.
You can also use a matte brush-on varnish. Please note that by using this method, your entire glass will look dull and not shiny. You can restore the polished glass look when you varnish with a gloss varnish.
JW etc. ‘s Undercover
That is an all-purpose surface primer, and it works GREAT on glass. It has a white appearance so it won’t dry clear. But, you can mix your paint color with the Undercover to give it a hue and make it more durable on your glass surface. Brush it on only in the areas you will be painting. Let each layer of Undercover dry before adding the next layer (to prevent lifting).
The more coats you add and the longer it sits, the more durable it becomes!!! You can get Undercover from us.
Finishing Up – When your painting is thoroughly dry, brush, or spray on your favorite varnish. If you want it to look shiny, like glass, use a gloss varnish.
Cleaning – Acrylic paint can be very tender and sensitive to soap and water. I recommend that you only hand clean your painted glass with a moist, soft cloth. Anything more harsh could scratch-off or loosen your painting.
Using Enamels or Glass Paints
Enamel paints can be baked or air-dried for two weeks before using.
Glass Prep – Read the glass cleaning instructions according to the enamel paint manufacturer. Some may recommend that you use their glass conditioners. I have had great success with using rubbing alcohol and a cotton ball to clean my glass surfaces before using “glass paints.” Of course, to have the absolute best results, use the manufacturer’s instructions.
Finishing Up – When you finish painting, let the paint dry according to the manufacturer’s instructions. I like to use their glazes or varnishes over the top of the picture for extra protection.
Air Dry or Bake in Oven – Follow the manufacturer’s instructions for baking temperatures and baking times listed on the bottle. Here is my experience with air dry or oven-baked: I have had much better results if I have baked the glass in the oven (I followed the manufacturer’s instructions listed on the bottle).
Most will let you air dry, but I have found that the paint washes off, or chips off. The baked glass held up after use and cleaning. I recommend baking the glass in the oven. If you prefer not to use an oven, let the project sit for two weeks before handling, and then be sure to only hand wash and never let your project soak in the sink.
Cleaning or Washing the Painted Glass – Enamel or glass paints are much more durable and can be hand washed with warm soapy water, and you can wash some washed in the dishwasher on the top rack. However, I recommend hand washing. That eliminates anything that could go wrong in the dishwasher. I’ve always had the best results by hand washing.
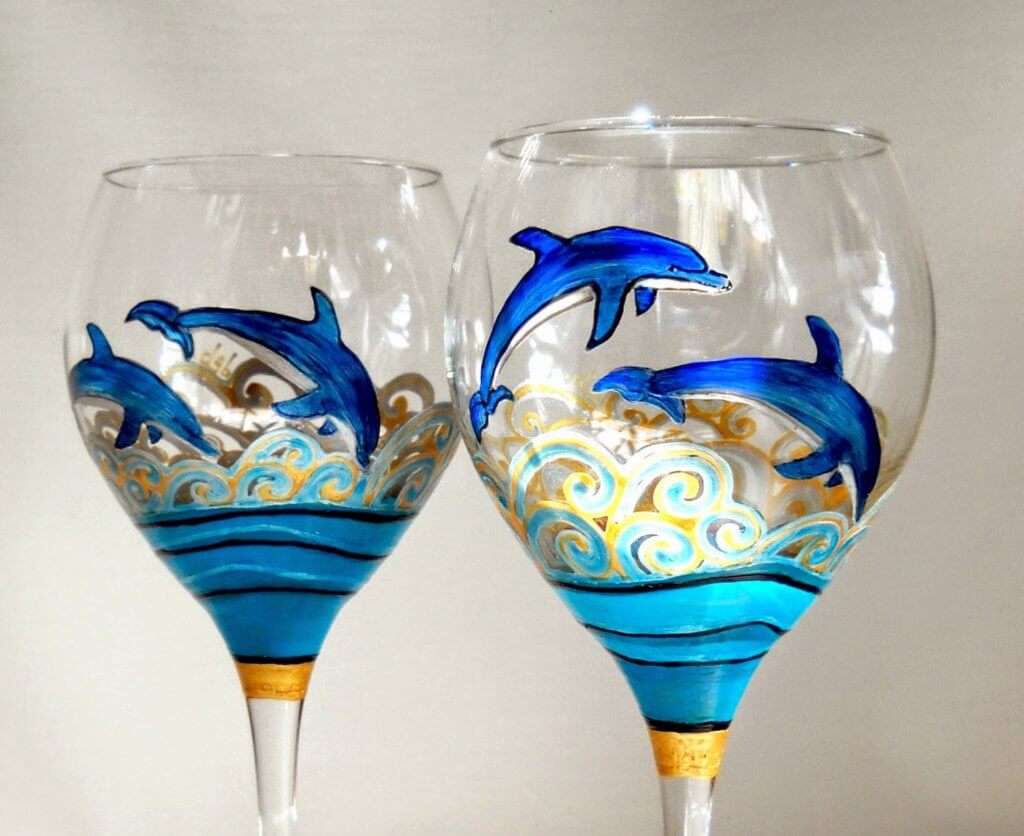
I hope you found this helpful! Now get out those old jars, paint some fun drinking glasses even paint some glass Christmas ornaments!
Dots
I have had several requests about dots, so here is a lesson on the almost perfect dot.
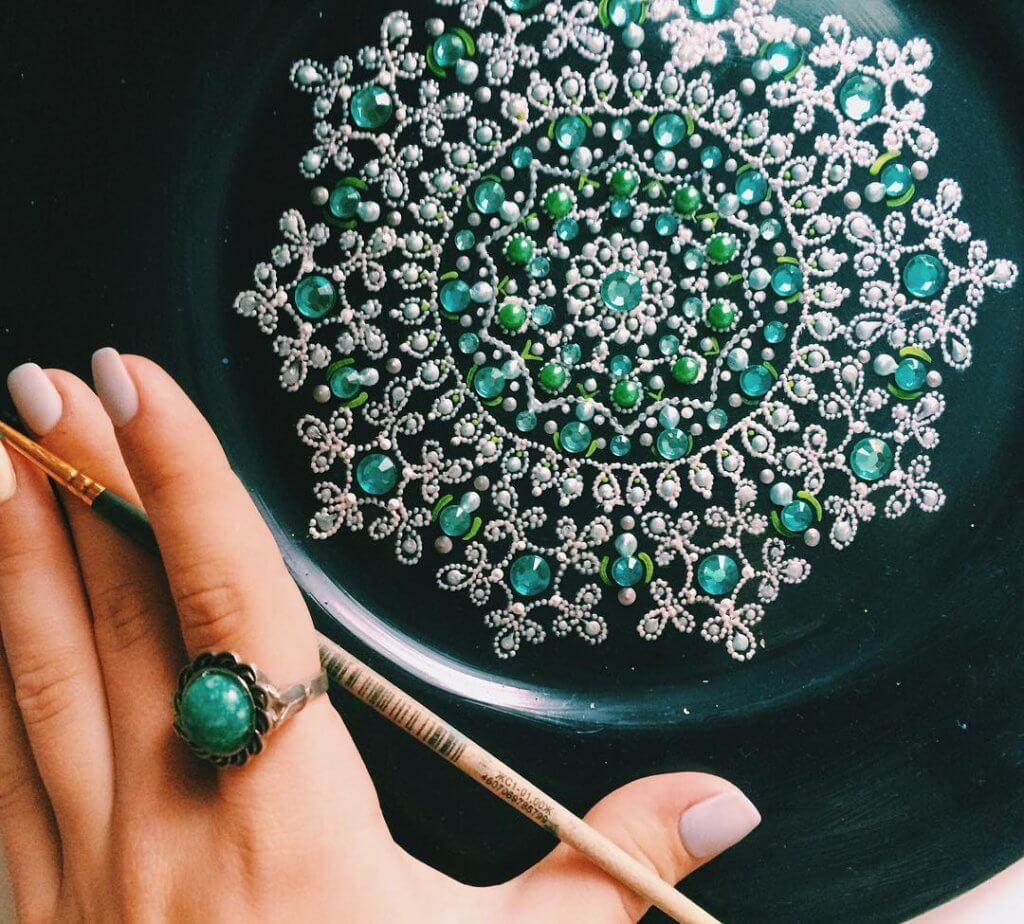
It is effortless to make the almost perfect dot. I call it the “almost perfect” dot because of one characteristic – it has texture/dimension. The “perfect” dot would be flat on your painted surface, no texture/dimension whatsoever.
One Dot
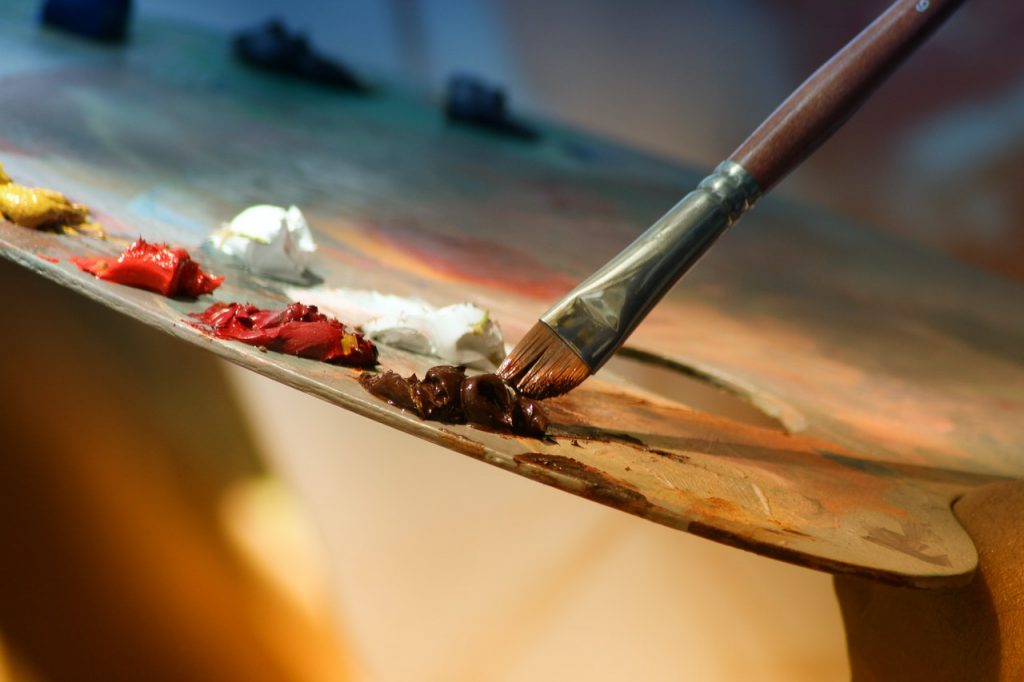
With a fresh puddle of paint on your palette, take the WOODEN end of your paintbrush, at a 90-degree angle, dip it into the paint puddle and then lift out. Next, again, with the painting brush at 90-degrees, place the wooden end of your brush (with the paint on it) where you would like your dot to be. Lift straight up, and voila, a dot.
Many Same Sized Dots
To get a row of dots that are the same size, you will need to wipe the paint off the wooden end of the brush AFTER EACH DOT. Then, redip in the paint puddle for the next dot.
Descending Dots
Descending dots are very easy. You will only need to dip the wooden end of your brush in the paint ONCE. Place your first dot, lift, place the next dot (which will be slightly smaller than the initial one), lift, and repeat until your dots have descended as little as you want.
Ascending/Descending Dots
For this set of dots, you will need to dip into your paint puddle twice. The first dot is the largest and therefore will go in the center. Now follow the numbers to see the order in which to place your dots. example= 5, 4, 3, 2, 1, 7, 8, 9, 10
Tutti Dot
Tutti dot is a name for a simple design made up of 3 dots. Notice how the design is a triangular shape. You will dip the wooden end of your brush into the paint once. Next, you will make three descending dots. I teach my students to place the dots in the same patterns for each set of tutti patterns you do. That will help make your projects look more professional if your tutti dots are always consistent in their shape.
Dot Hearts
Or as we call them, Dolly Parton Hearts. Dip the wooden end of your painting brush into the paint puddle. Next place a dot and another dot SIDE BY SIDE. Make sure they touch. Take the wooden end of your brush and place it where the two dots meet, now quickly pull the end of the brush towards you, stretching the paint into a point. These take a little practice, but you will dotting hearts in no time!
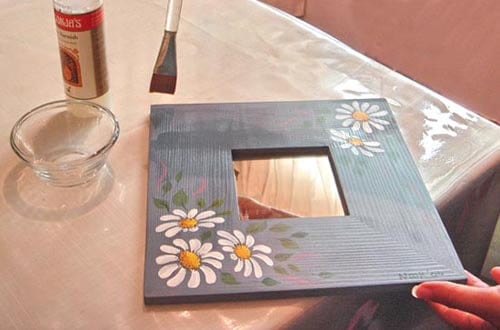
Dot Flowers
Easiest flowers!!!! I like to start with the flower center first and then place the flower petal on afterward. Pick a different color for the center than the petals. Dot the center, wipe off, dip in petal color, and dot them on. You can have them descend in size, or you can have them all the same by wiping and re-dipping for every single one.
Dots are a great way to add to a project. You can make repeating patterns, simple flowers, and I’m sure you can come up with many more.
Wood Preparation
To have the best possible wood surface to paint your artwork on, please take the time to prepare the wood.
Fill any holes, scratches, or gouges with wood filler. Let dry.
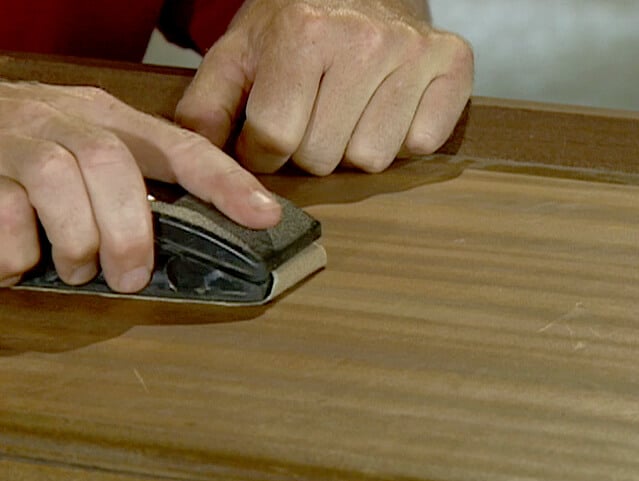
Sand the wood with 150 or 220 grit sandpaper. Please sand along the grain of the wood. If you sand across the grain, it could leave tiny scratches that you could see after you paint. CAUTION: if using an electric sander, please wear safety equipment.
Seal the wood with either a water-based or oil-based wood sealer. Let dry. Wood is a porous material, and without sealing it before you paint, the grain could raise, leaving you with a rough and bumpy surface. CAUTION: please seal your wood in a well-ventilated area.
Sand the wood one more time with 220 or 400 grit sandpaper. Some painters also use the unprinted side of a brown paper sack to sand with. This final sanding smoothes any rough surfaces left after sealing. That should give you a beautiful smooth surface.
Remove any sanding dust with either a tack cloth or I prefer to blow the dust off with my air compressor. A tack cloth might leave some residue behind. CAUTION: when using an air compressor, take care not to blow directly onto your skin, and please wear a dust mask and eye protection to keep your eyes and lungs safe. Now you are ready to paint on your wood!
Varnishing
There are many different types of varnishes out there, sprays & brush on, matte, satin & gloss – which one do you need? Well, that is up to you, but here is some information you might need.
Matte – Non-shiny, dull
Satin – A semigloss, velvety finish
Gloss – A gleaming finish
These all come in a spray can or in a brush-on form.
Be sure to follow the manufacturers instructions and cautions on the container carefully. Most require you use them in a well-ventilated area and to dispose of any used rags outside in a metal container away from any structures. With some varnishes, the cloths can catch on fire without any flame present
What helps me to get a beautiful finish on my projects is patience! Use thin, light coats and let each coat dry before applying the next.
After about 4-6 coats, you can lightly sand in between layers for a more durable professional finish. Use 400 grit or higher sandpaper. An unprinted paper sack is suitable for this sanding process too.
Let it dry 24 to 48 hours.
Use a furniture wax to finish your piece.
Side Load or Float
Sideload or Float – One way to achieve highlights and shades on your projects is to use a side load or float technique.

Use a broad flat brush that is in good shape (no splits, bristle curls, or anything that keeps your brush from staying flat). The larger the brush, the better. I usually use flat brushes that range from a size ten on up to a 3/4 inch. The larger the brush, the less likely you are to make a mistake.
Your brush needs to have some water in it, not too much and not too little. I know that sounds complicated, but it is difficult to explain in words. It would be a whole lot easier if I could show you. What I usually do is the following:
Dip your bristles in clean water.
See how your bristles look very shiny and wet? Lay your brush flat onto a paper towel, and as soon as the shine goes away, lift your brush off the paper towel. That usually is about the amount of water that you will need.
With one corner of your brush, dip it into a puddle of paint. (note: the more significant the dip, the more comprehensive your float will be) Blend this color on your palette by brushing your bristles back and forth in the same spot until the color appears to be floating across your bristles. Make sure that the color ends before it reaches the other side of your bristles. If your brush is too wet, pinch the water off the corner without the paint.
Check your blend on your palette to make sure that you are happy with it. If you are, then place your sideload/float onto your project. As long as it is still moist on your project, you can work over it. Please stop fiddling with it before it dries 🙂

Tips
Use retarder or extender to slow the drying time of your float.
After blending the first time, reload your paint and blend again, this will give you more to apply to your project.
Double-Load your brush. On corner of your bristles dipped in your base coat color, and the other corner dunked in your shade/highlight color. Blend in the same spot on your palette. Apply the float to your piece making sure the colors are in the right places. (Oh, how many times have I made that mistake!)
Brush Care And Cleaning

There have been and will always be great discussions and opinions on how to take care of your painting brushes, so I will give you a few differing opinions, and you can decide for yourself which care and cleaning methods you chose to try. The one thing that we all agree on is that your brushes DO need care, and they DO need cleaning.
Now, the debate begins.
Brush Care
Never leave your brushes sitting in your water bucket! That could permanently curl or bend the bristles. It could also make the ferrule wiggly – how? – Well, I am glad that you asked. The water absorbs in the wooden handle of your brush, and the moisture makes the wood expand, and expanding grip means an expanding ferrule. When the moisture evaporates out of the handle, the wood shrinks back to its standard size, but the metal ferrule doesn’t. Another thing that can happen is the glue that helps hold the ferrule onto the handle gets wet and then no longer glues them together.
Storage of your Brushes
There are a few options for brush storage.
- Let your brushes lay flat. Never stand your wet brushes bristles up, the water and/or leftover paint could run into the ferrule and ruin the glue.
- Store your brushes, bristles up, in a cup or brush holder. That keeps them from rolling around and preventing possible damage – being stepped on, having the brush roll, and the bristles might get bent.
- Leave soap on bristles to help them retain their shape during storage or transport, wash soap out before you paint.
- Never leave soap in bristles. You would never let soap dry in your hair, so don’t let it dry in your bristles.
Never let paint dry in the brush ferrule! Most acrylic paints have binders in them. As the paint dries, they harden, and the bristles begin to separate, leaving you splits in between your hairs. It also makes beautiful stroke work much more complicated than it has to be.
Brush Cleaning
Always clean your brushes after painting (unless you like buying new brushes all the time).
- Mild soap works very well to clean out any paint left in your bristles.
- Brush cleaners were made to clean brushes, so use them instead of soap.
- Clean brushes as if they were your hair. You would never use anything harsh on your hair, so don’t use it on your bristles!
- Rubbing alcohol works very well to clean any paint left in your bristles. There are some cautions here – Make sure you are in a well-ventilated room, don’t get any on the painted part of your handle, it could take the paint off.
- Leave extender/retarder in your brushes; that way, the paint never dries in your bristles.
- Clean your brushes with 409, Simple Green, Murphy’s oil soap. Any of these will get paint out of your bushes.
So, are you confused? I will tell you how I take care of my brushes. You may not agree with me, but please feel free to try different storage and cleaning methods. I still have brushes that are eight years old, and they are in great shape.
After painting, I give my brushes a good rinse with a mild soap (like Ivory) and water.
If I am transporting my brushes to a class, then I will brush my moist bristles into Ivory soap and let the soap dry. I feel my bristles hold their shape very well, with little or no bristle bending or splitting until they reach the class.
If there is some paint build-up in my brushes, I clean them with rubbing alcohol, making sure that I don’t get any on the brush handle.
If I have been very careless and have a lot of paint-build up in my bristles, I will clean them with DaVinci’s brush cleaner. It has acetone in it (same as fingernail polish remover). I use it as a last resort, and I feel it may be a little harsh. DaVinci’s is a great product, and it will get your brushes clean. Be sure not to get any on your brush handle, as it could eat off the paint.
I store my brushes both flat and bristles up in a cup, and I haven’t noticed any difference between the two.
I only use my best flat brushes for sideload/floating. When they get old, they get demoted to a base coating brush. Take care of those brushes; they cost a lot of money!
Tin And Metal Preparation
The most important thing to remember about prepping your metalware is that it needs to be very, very clean before you prime the metal.
Dirty, rusty metal – If you would like to paint on the rusty piece of metal, you must get all the rust off and wash off the dirt. One of the best ways to do this is to sandblast your metalware. Since most of us don’t have access to a sandblaster, the next thing to do is to get out your wire brush and brush the rust off. I have heard that some people rub a raw potato to get rust off. I have never tried this method, and I would be interested to know if it works.
Shiny rust-free metal – Even though it looks clean, you now need to wash your metalware with soap and water. Get off any dirt or dust and rinse. Now, get out some white vinegar and use it to rinse off any soap residue that might be left behind. Then, let your metalware dry.
Drying clean, shiny metal – If your piece is small enough, you can dry it in a warm oven. Preheat your oven to 250 degrees and then turn it off. If the temperature is any higher than this, the solder on your piece could melt. After you turn off your oven, place the metalware in the oven and leave it in there until your oven is completely cooled. Your metalware needs to be completely dry, or your primer won’t adhere to the metal.
Priming – My favorite method of priming metal is to use Blair Metal Primer. It is a gray metal primer in a spray can. CAUTION: if you use a spray primer, please use it outdoors or in a very well ventilated room. Remember that this primer will stick to anything it gets sprayed on. It will be permanent on your concrete or outside of your house. Spray with light, even coats, to avoid running drips. Let each coat dry before spraying on the next. Follow the directions on the can for drying time.
The most environmentally friendly way of prepping your metal is to use JoSonja’s All-Purpose Sealer. It is a non-toxic waterbased sealer and will be very safe. You can either; brush on several coats of sealer, or if you are basing in with a JoSonja color, you can mix your JoSonja color in with the sealer – seal and base at the same time. If you use this method (mixing paint and sealer), you can use the oven drying method, described above, to get a very durable basecoat.
Beginning Stroke Roses
Comma Strokes
You will need a good round brush; the more significant the brush, the bigger your strokes will be. With water in your bristles, load a generous amount of paint on your brush (you should have color almost up to the ferrule), tap the tip on your palette to get the tips of your bristles to lay a bit flat.
Lay the brush on a 45-degree angle, press the bristles with pressure to get the rounded tip of your stroke. Begin to pull your stroke (in a comma direction), lifting on the hairs as you draw. Keep raising until you get a nice tail. Comma strokes take a lot of practice. Don’t get discouraged; just keep practicing!!!!
Delta Ceramcoat colors used: Indiana Rose – light value Gypsy Rose – medium value Mendocino – dark value Chrome Green Lt. – leaves
There are many ways to paint roses, so let’s begin here with one of the basic stroke roses.
- Pick a medium value and base your rose in a circle.
- With a darker value, sideload your brush, blend on your palette, and shade the bottom of the circle with a “C” float. Next, shade the inside of the rose with a small “c” float; this goes near the top.
- Now you will begin your comma strokes to define the rose petals. I recommend a few practice comma strokes on a piece of scratch paper before you place your strokes on your project. An essential thing for nice looking roses is to make sure that the strokes follow the curvature of the circle.
- With your darker value, lay in the comma strokes on the left (or right) side of the circle. Have your strokes begin off the ring a bit. Pull the stroke with the curvature of the circle and end it more than halfway across. Repeat the other side with your light value and make sure the commas fit between the dark value comma. Pull the strokes more than halfway across if the comma strokes end in the center. Pull a comma stroke on the top of the circle and have the tail wrap partially around the little floated “C.”
- The stamen in the rose center is light value laydown strokes. Add some large green “one” strokes off the bottom to give your roses a finishing touch.
Round Brush Strokes
I wish that I could have every one of you come to my studio and show you how to do this in person. But, since I have to try and get it into words, please bear with me!! I know that learning stroke work is a little intimidating, but with lots of practice, you can master any stroke! Practice, practice, practice – that is the best hint I can give you! Always do a few practice strokes on scratch paper before you place that stroke on your project.
The first stroke lesson will be with the round brush. I like to use the Royal 2 round #250 to practice circular strokes with.
Paint consistency: The consistency of your paint will determine the smoothness/flatness or the texture of your stroke. To achieve a smooth/flat stroke (feels flat on your project), you will need to water down your acrylics with water.
The best description I have learned is to get your paint to the consistency of ink. Now, if you prefer a textured stroke (you can feel the paint rising on the surface of your project), there is no need to add water, just load your brush with lots and lots of paint (I mean a lot!). Loading the round brush: There are two ways of loading your round brush, twisting or pulling. Twisting will achieve a thin, rounded point on the tip of your bristles. “Pulling” will leave the hairs flattened and not coming to a point at the tip. Ready, here we go!
One Stroke/Tear Drop
The one stroke is one of the most common strokes. This stroke is straight, and you will need to do a slight twist at the end of your stroke to achieve a nice tail. You will need to load your brush by PULLING your bristles through the puddle of paint.
It helps to have the bristles flattened and a nice load of color at the tip. Lay the flattened tip of your bristles on your practice paper at a slight angle and press. As you paint your stroke, come slowly from an angle to having your brush perpendicular to your canvas.
Look to see if the bristles and paint are beginning the stroke with a beautiful rounded top. If it looks good, start PULLING and SLOWLY LIFTING the brush to begin the tail.
A one stroke with a tail that comes to an excellent tip is your goal. Keep pulling and lifting until you have raised the bristles completely off the paper. If the tip of the tail is ragged looking, then you might need to twist your hairs at the end to achieve the fine tip.
Comma Stroke
This stoke is a one-stroke with a bend. You will need to load your brush with paint, in the same manner, that you would do a one stroke. Pull your bristle through a puddle of paint, leaving your brush flattened and with a nice load of color at the tip.
Lay the bristle down and press to achieve a nice rounded top. Since this is called a comma stroke, you will need your stroke to look like a comma. You will find that a comma will look better swinging to the left or swinging to the right, just like when you paint eyes – one is always more prominent than the other LOL!!! (just a joke).
For me, it is easier to pull my commas as if I am painting a smile. Since I am right-handed, I can easily pull my comma from left to right. My little girl is left-handed, and she pulls hers more natural right to left.
There are no strict rules on how to do this, if it is easier for you to draw from top to bottom, then do it that way. Your stroke will look its best when you find the best way for YOURSELF! Now, no more lecture, on with the lesson.
With a comma stroke, you most likely will not need to twist your bristles to make a nice tail. As you pull the stroke, the bristles get even flatter, and the tip will have a nice chiseled edge. Use this chiseled edge to achieve a nice fine tip on the tail of your comma.
Crescent Stroke/Skinny-Fat-Skinny
To achieve a good crescent stroke, I recommend thinned/inky paint, and you will need to twist your bristles in the paint to get a helpful pointy tip at the end of your brush. I like to think skinny-fat-skinny when I do this stroke because that is precisely what you will be painting.
Hold your brush perpendicular to the paper, now with the tip of your brush, start your stroke. Slowly press the bristles down to get a fatter line and then slowly lift the bristles to make the line get skinny again. The goal is to get a nice shaped crescent with the line going gradually from skinny to fat to skinny again. My example here isn’t perfect, but at least you get the idea!

S stroke
The S stroke is a skinny-fat-skinny, one in an “S” shape. Load your brush with thinned/inky paint and twist your bristles to get a nice point at the tip of your bristles. Hold your brush perpendicular to your paper, and begin your S stroke with the tip of your brush. “S” strokes take a lot of practice, very smart painters will practice these strokes every chance they get.
You learn great brush control! The tails of your “S” stroke should start and end with fine points, the center of the “S” is where you will press the bristles down. Again, think skinny-fat-skinny as you are painting your “S.” These strokes also be done with a flat brush, and that will be another lesson. You can get very creative with “S” strokes. They can range from straight to curvy and flowy. Link them together, and you get what is called a lifeline.
I hope these round brush lessons help you a little bit. Remember – practice, practice, practice!!!
Using A Liner Brush
Linework can add greatly to a project. You can outline shapes, add curly vines to a floral project and do tiny detail work, all with a liner brush.
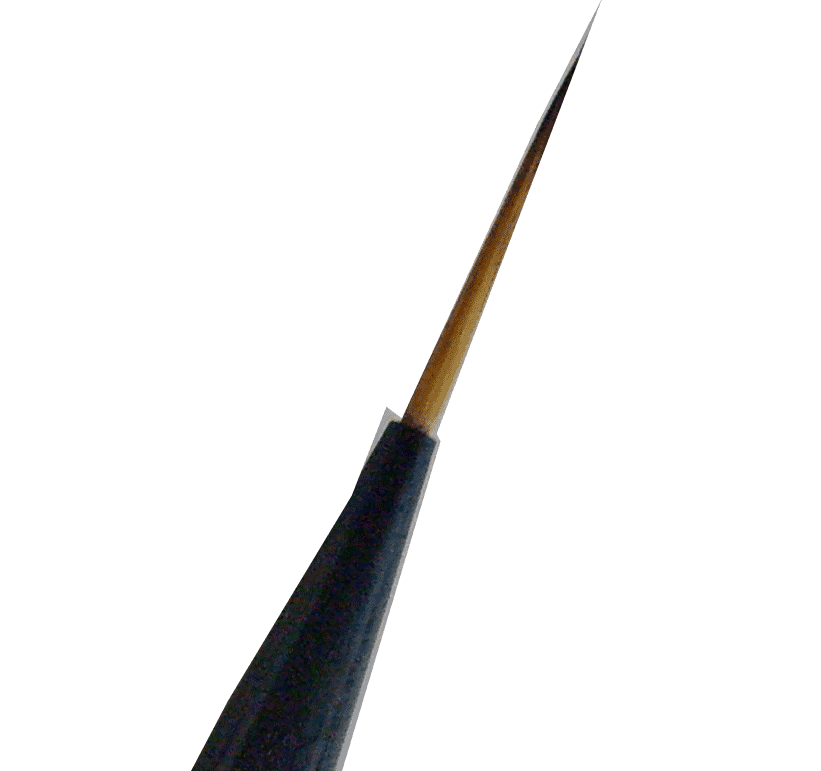
Liner brushes are very small round brushes. They have fewer bristles in the ferrule and range in sizes from 18/0 up to a 1. There are two types of liner brushes:
Liner – can range from 1/2 inch to 1 inch long bristles. Liners are for all the other linework you need to do. My favorite liner is a 10/0. I use it to outline, paint stitches, sign my name, paint curly vines, Santa beards and mustaches, and on and on. There are many, many uses for a liner when you paint.
Scroller – bristles longer than 1 inch. Scrollers are for when you have a long, long line to paint. They hold a lot more paint than a regular liner brush. I usually use my scroller when I am painting vines and long lines.
Loading A Liner
For your liner to do what you want, you will need to load it properly. Since there are very few bristles in a liner brush, the paint in your bristles will dry quickly. Paint straight out of the tube or bottle will not flow nicely off your liner brush. You will need to thin your paint with water for the paint to flow smoothly and evenly off your bristles. When mixing paint and water for linework, try to get the paint to an inky consistency.
Once your paint has thinned to an inky consistency, twist your bristles through the inky paint until your liner brush loaded with paint. The twisting motion leaves a nice point on the tip of your bristles.
Painting With A Liner
The easiest way I have found to use a liner when doing stitches, curls, and small projects; is to hold my liner on the ferrule close to the bristles. I also hold my liner at a 90-degree angle; this helps me control the liner more easily.
When I am doing long lines and vines, I have found that it helps me to hold the brush just above the ferrule. This hold lets me have a looser grip and more freedom to maneuver my liner around a bigger project. Looser linework helps vines look more natural.
Tips: Remember, inky paint and a good point on your bristles will help you in painting your linework.
We offer a great learning tool to help you develop those perfect strokes
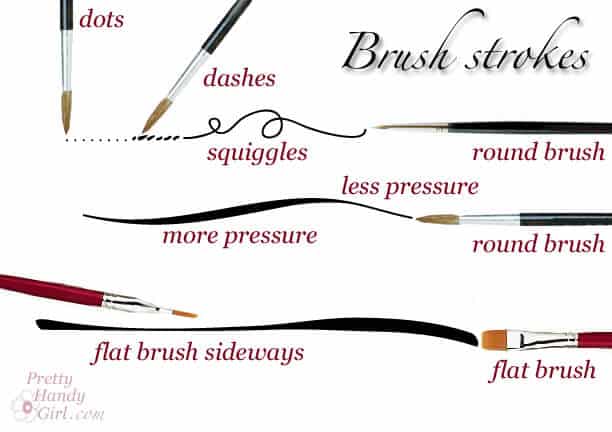
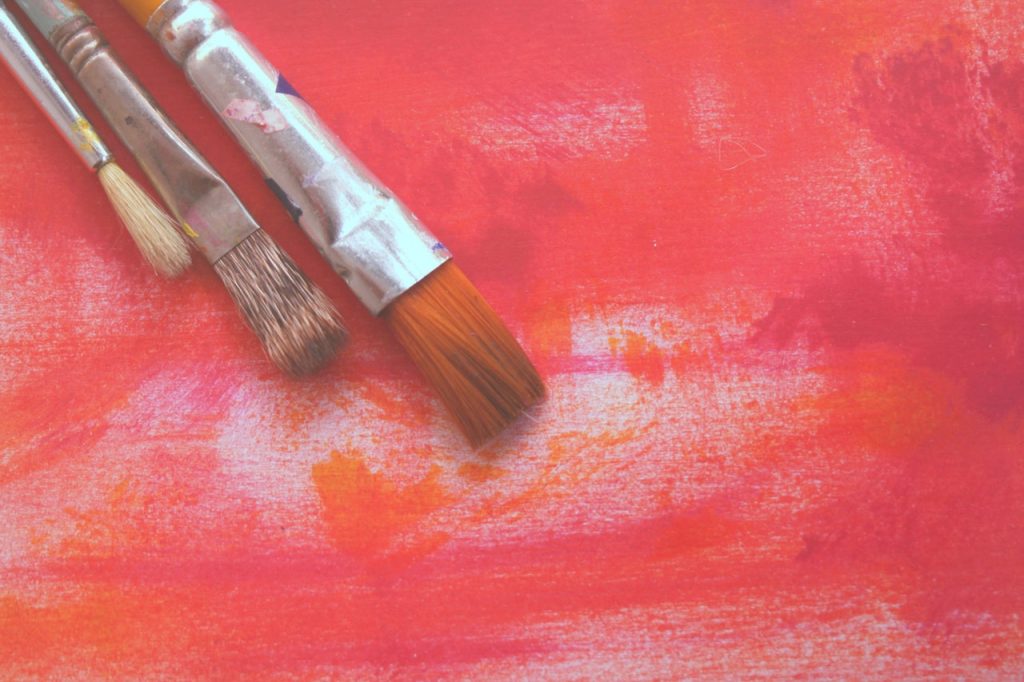
Flat Brush Strokes
What is a Flat Brush? You will be able to recognize a flat brush by the ferrule. The ferrule is pressed flat, so the bristles have two broad, flat sides and two narrow edges, and usually, the bristles are straight across. This cut at the end of the bristles will form a chisel edge.
Loading a Flat Brush Keep in mind when loading your flat brushes, not to get the paint up the bristles to the ferrule. A good load won’t go more than 1/2 to 3/4 of the way up the bristles. If paint dries in the ferrule, it will ruin your brushes.
When loading your brush, don’t dunk the bristles in the center of the paint. Instead, dip the end of them on the edge of the paint. Next, drag the bristles out of the paint on to the palette, working each side of the bristles. Remember to stroke the excess paint off the bristles before executing your stroke.
Specialty Techniques – STIPPLING
Stippling is a great technique to use on fur, cheeks, background foliage, and I also use it to do flower centers, highlighting, and shading.
TECHNIQUE: Less is better – The less paint in your bristles, the better your stipple will be. Too much paint will look blobby and heavy, whereas less paint looks lighter and daintier. (I will explain how much paint to load into your brush further down.)
Hold the brush at 90-degrees and lightly pounce the tip of the bristles on to the project. After a pounce, notice that there may be a pattern to the paint? In order not to develop a pattern within your stipple, slightly roll the brush in your fingers after each pounce.
Brushes To Use
My favorite stippling brushes are white nylon fabric scrubbers and old scruffy brushes with paint in the ferrules. (I know I told you in the beginning lessons not to get paint in the ferrule, but it will happen eventually, and now you will have an excellent stippling brush!)
Fabric Brushes
With as dry as you can get bristles, stick the tip of the bristles into a puddle of paint. Wipe off the excess paint on a paper towel. Pounce a test on a scrap piece of paper. Is the stipple too heavy, thick, or blobby?
If you said “yes,” then you will need to brush out some more paint on your paper towel. After your test pounce, if the color is light and airy, then you are ready to stipple on your project. Remember – Less is Better! You can always stipple more after each layer dries to get it darker.
Scruffy Brushes
You will get different looks depending on if you are stippling with dry or moist bristles. Dry bristles will give you a softer, more delicate look, while damp will make your stippling look spotty (great for background foliage). You will load the paint in the same manner as above and pounce in the same way as well.
Conclusion
There are many techniques to learn in the world of painting. In this article, we have tried to share with you some of the more valuable techniques that can be used for decorative painting on all different materials. I hope that this article has helped you with at least one or two of them. Remember, take your time, and practice. It may take you a while to become proficient in these skills, but with the right amount of dedication, you will become very good at them.
References
Images made with Adobe Spark
Featured image from Envato Elements
Tole Painting from Wikipedia